Getting started
API reference
Templates
Webhook links
Getting started with Webhook links
In many cases, you may need to send an email notification when a specific event occurs within a third-party service. Say you want to get automatic email alerts: maybe for a new sale in Stripe or when someone joins a specific group in your newsletter.
With webhook links, you can capture data from third-party services, filter it, and send it via email.
The main benefits of using webhook links are:
- Easy to set up (no code).
- Ability to create rules and filters based on incoming data.
- Add as many recipients as you want.
- Send multiple templates.
- Attach PDF templates.
- Use incoming data to replace variables in your HTML and PDF templates.
- Send emails with your SMTP server.
- Add multiple SMTP servers.
How do webhook links work?
Webhook links are simple to use. You can create a webhook link in your account and use it in your third-party service.
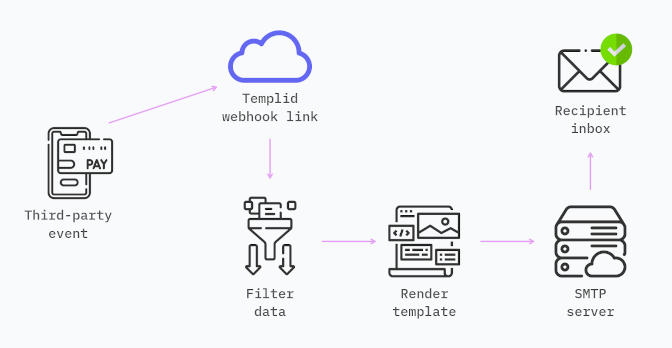
When a specific event occurs in the third-party service, it will send a POST request to the webhook link you created. The webhook link will capture the data and send it via email to the recipients you specified.
You can add rules and filters when creating a webhook link to filter the incoming data. This allows you to send only the data you need.
For example, you can add a filter to send an email only when a new sale occurs in Stripe and the amount is greater than $100.
Below is a diagram that shows how webhook links work:

